
How to create workflows in systeme.io
In this article, you will learn all about workflows and how to create them in systeme.io.
Creating a new workflow
Log in to your systeme.io account, click on the “Automations” tab in the menu bar, then select “Workflows.”

Click on the "Create" button.

Choose a name for your workflow and click “Save.”

Now that a new workflow has been created, you’ll need to define triggers and assign actions.
1) Adding a trigger
A trigger is an event that starts the workflow — for example, when a user purchases a product or subscribes to your newsletter.
To create a trigger:
- Click on “Create your first trigger”
- Then click on “+” to define the next step in the workflow
 ou can choose from the following trigger types:
- Meeting scheduled: When a contact schedules a meeting
- Tag added / Tag removed: When a tag is added or removed from a contact after the workflow is activated (tags added/removed before activation are not considered)
- Funnel form subscribed: When a contact subscribes via a funnel form
- Blog page form subscribed: When a contact subscribes via a form on a blog page
- Campaign completed: When a contact completes a campaign
- Webinar registration: When a contact registers for a webinar
- Enrolled in course: When a contact enrolls in a course
- Course completed: When a student completes a course
- Module completed: When a student completes a module
- Lecture completed: When a student completes a lecture
- Enrolled in a course bundle: When a contact enrolls in a course bundle
- New sale: When a customer purchases an offer
- Sale canceled: When a subscription is canceled or a one-time payment is refunded
- Email opened: When a contact opens an email
- Email link clicked: When a contact clicks a link inside an email
- Page visited: When a contact visits a specific page
- Enrolled in community: When a contact joins a community
- Subscription payment failed: When a subscription payment fails
- Digital store form subscribed: When a contact subscribes through the “Collect emails” section in the digital store
Notes:
- You can define multiple triggers to occur simultaneously
- Actions will only be executed if the trigger happens after the workflow is activated
2) Adding a workflow step
After setting up a trigger, click “+” to add the next step. You can choose from:
- Action: An operation performed in systeme.io (e.g., add/remove tag, subscribe to a campaign, etc.)
- Decision: Branch the workflow depending on the contact’s characteristics (using filters)
- Delay: Insert a waiting period before moving to the next step

Sample workflow
Let’s create a sample workflow to illustrate how to use these elements.
Background
In this scenario:
- You are selling two offers
- You have two campaigns: Campaign 1 promotes Offer #1 and Campaign 2 promotes Offer #2
- An automation rule tags every buyer of Offer #1 with “Customer 1”
Workflow sequence
- When a lead subscribes through the squeeze page, subscribe them to Campaign 1 to promote Offer #1
- If they buy Offer #1:
- Unsubscribe them from Campaign 1
- Subscribe them to Campaign 2 to promote Offer #2
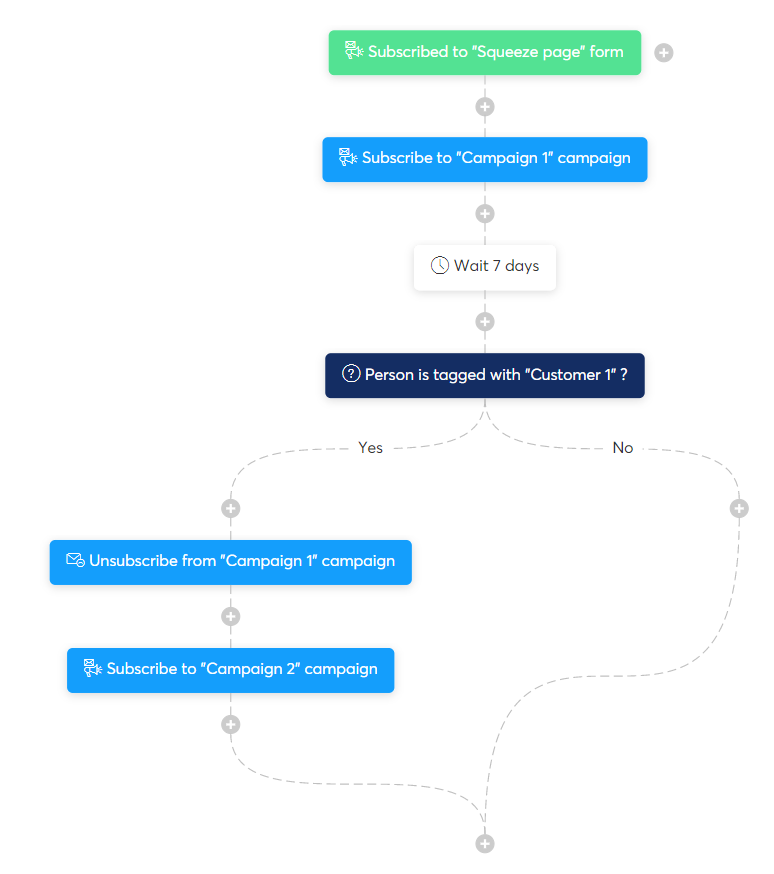
Steps to follow
- Create a trigger: Choose “Funnel form subscribed” and select the squeeze page

- Add an action: Choose “Subscribe to a campaign” and select Campaign 1

- Optional: Add a delay so the contact has time to receive emails from Campaign 1

- Add a decision: Use the “Tag” filter → “Contact tagged with” → choose “Customer 1”

- After the decision, there are two possible paths:
- No: The contact doesn't have the “Customer 1” tag (they haven’t purchased yet)
- Yes: The contact has the tag (they’ve purchased)
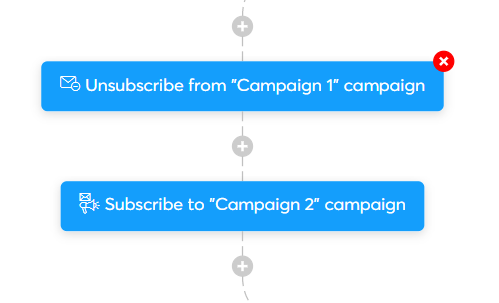
If Yes, add two more actions:
- Unsubscribe from Campaign 1
- Subscribe to Campaign 2
Once the workflow is configured, you must activate it.
Activating the workflow
To activate the workflow :
- Go to the workflow list
- Hover over the three dots (...) next to the workflow
- Click “Activate”

Deactivating the workflow
To deactivate a workflow:
- Go to the workflow list
- Click “Deactivate”

You’ll be given two options:
- Deactivate workflow: Stops new contacts from entering, but existing scheduled tasks will continue
- Deactivate workflow and cancel related scheduled tasks: Prevents any further scheduled actions from being executed
Choose the option that fits your needs, then click “Confirm” to finalize.

Updated on: 08/07/2025
Thank you!